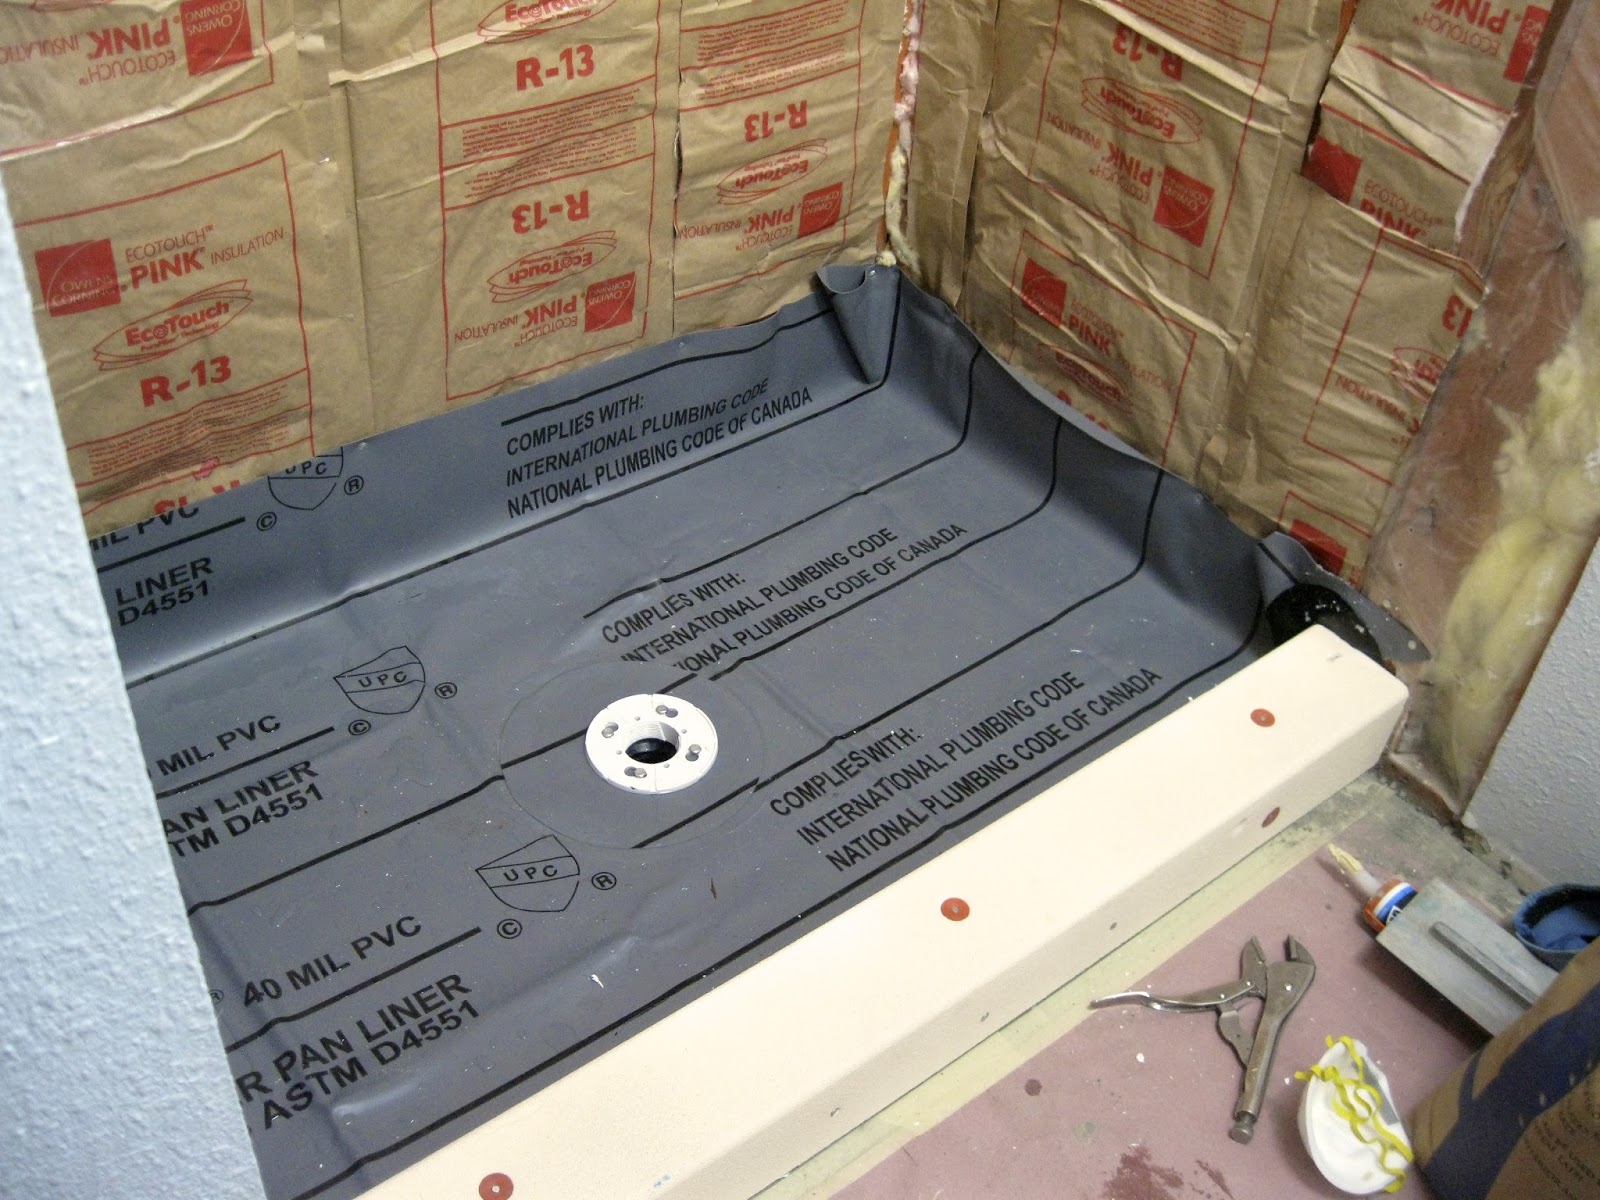
Shower Pan Installation: Conquer Your Bathroom Renovation Fears

So, you're staring at that dingy, dated shower, dreaming of a sleek, modern oasis. You've considered calling a contractor, but the price tag makes you choke on your morning coffee. Don't despair! Installing a shower pan might seem daunting, but with the right guidance, it’s a project you can absolutely tackle. This is your ultimate shower pan installation guide, here to demystify the process and give you the confidence to DIY.
Let’s be real, a botched shower pan installation is a nightmare. Leaky floors, mold infestations, and expensive repairs are just the tip of the iceberg. A properly installed shower pan is the bedrock of a functional and beautiful bathroom. This guide will arm you with the knowledge to avoid these pitfalls and achieve a watertight seal that lasts for years.
The history of shower pans is intertwined with the evolution of indoor plumbing. Early shower pans were often simple lead or copper liners, prone to leaks and corrosion. Modern shower pans utilize more durable materials like acrylic, fiberglass, and custom-tiled mortar bases. Understanding the evolution of shower pan installation techniques allows us to appreciate the advancements made in waterproofing and design.
A shower pan, in its simplest form, is a watertight receptor that collects water and directs it to the drain. It’s the unsung hero of your shower, preventing water damage and keeping your bathroom floor dry. Shower pan installation guides provide crucial information on selecting the right pan for your space, preparing the subfloor, and ensuring proper drainage. Without a solid understanding of these fundamentals, you’re setting yourself up for trouble.
The biggest issues DIYers encounter with shower pan installation often stem from inadequate preparation, improper sloping, and incorrect sealant application. This guide addresses these common pitfalls, providing clear instructions and helpful tips to ensure a successful installation. We’ll walk you through the process step-by-step, so you can approach your project with confidence.
One benefit of understanding shower pan installation is cost savings. Hiring a professional can be expensive, but DIYing can significantly reduce your overall renovation budget. Another benefit is the satisfaction of completing a challenging project yourself. Plus, a properly installed shower pan adds value to your home.
Step-by-step Shower Pan Installation:
1. Prepare the subfloor, ensuring it's level and structurally sound.
2. Install the drain assembly, ensuring proper connection to the plumbing.
3. Set the shower pan in place, checking for level and proper fit.
4. Apply sealant around the edges of the pan, creating a watertight seal.
5. Install the shower walls and finish the surrounding area.Checklist:
- Shower pan
- Drain assembly
- Sealant
- Level
- Measuring tape
- Safety glassesAdvantages and Disadvantages of Different Shower Pan Materials
| Material | Advantages | Disadvantages |
|---|---|---|
| Acrylic | Affordable, easy to install | Can scratch easily |
| Fiberglass | Durable, resistant to stains | Can be more expensive than acrylic |
| Tile | Customizable, stylish | Requires more skill to install |
Best Practices:
1. Always test the drain before completing the installation.
2. Use a level to ensure proper sloping.
3. Apply sealant liberally to prevent leaks.
4. Allow ample drying time for sealants and adhesives.
5. Consult local building codes for specific requirements.FAQs:
1. What is the best material for a shower pan? It depends on your budget and style preferences.
2. How do I fix a leaky shower pan? Identifying the source of the leak is crucial. It could be a sealant issue, a cracked pan, or a plumbing problem.
3. Can I install a shower pan over existing tile? It's not recommended. It's best to remove the old tile first.
4. What is the ideal slope for a shower pan? A quarter-inch per foot is generally recommended.
5. Do I need a professional to install a shower pan? While it's possible to DIY, complex installations may require professional help.
6. What type of sealant should I use? Use a 100% silicone sealant specifically designed for bathrooms.
7. How long does it take to install a shower pan? It can take anywhere from a few hours to a full day, depending on the complexity of the project.
8. What tools do I need for shower pan installation? Common tools include a level, measuring tape, drill, and sealant gun.Tips and Tricks: Dry fit the shower pan before applying any sealant to ensure a proper fit. Use a backer rod to create a consistent sealant bead.
Mastering shower pan installation empowers you to create a beautiful and functional bathroom without breaking the bank. By following this comprehensive shower pan installation guide, you'll avoid common pitfalls and achieve professional-looking results. Remember, proper preparation and attention to detail are key to a successful installation. Take your time, follow the steps carefully, and don't be afraid to ask for help when needed. A well-installed shower pan is not just a functional necessity; it’s an investment in your home and your peace of mind. So ditch the contractor, grab your tools, and get ready to transform your bathroom into the spa-like retreat you’ve always dreamed of. You got this! Now go forth and conquer that bathroom renovation!
Unlocking the magic of behr mushroom paint your guide to cozy chic
Embrace efficiency exploring the toyota rav4 hybrid
Unraveling the shawn levy and dan levy connection


